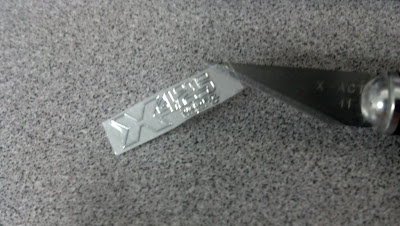
Happen to come across this online when looking around at decals for the MG Destiny to get ideas. And they are pretty cool, but will need some attention.
Since I was not able to really find a review / how to regarding them... Here is mine.
Here is a shot of the metallic decals next to a normal spread of Bandai decals from a MG kit. And yes, they are made from a metal. :)
These are an after market decal sheet with decent details for the most part. Tiny writing that could be printed on a dry/ water transfer and stickers seem to not come out as well in this medium but if you are wanting a nice metallic detail to your project then this can work for ya. From what I've seem online is just a silver and gold types. Also they are kind of raised as well. Adding more depth to a kit. Be it painted or not. But, how do you apply them and are they worth getting?
First, like a dry / water transfer, you have to cut it out from the sheet which has 3 layers. A clear thin plastic / the metal decal / then the paper backing. All held together with glue. But word of warning: You may notice that there is a thin line of metal interconnecting all of the decals. You will have to cut VERY close to the decal itself edge when removing from the sheet. I call this a fill line that is a result from when these are made and it's just something you will have to deal with. In most cases, it's not a big deal and easy to cut but there are some not so much. When the fill line goes through the whole decal. again, not something you can avoid but something to keep in mind should you get these.
Once cut from the sheet just carefully left the clear plastic with the decal from the paper backing using a hobby knife.
Then you are ready to apply. You can use tweezers for this part however I much prefer to just use the edge of my hobby knife. I feel that you have MUCH more control on the placement of the decal and more easily see it to make sure that it's straight. However, this is, of course, up to the modeler. There is really no right way to do this part. You use whatever method works for you. I will point out though that with these decals once you mess up it can be very hard to correct without the rick of ruining the decal. Just like most things in modeling, taking your time is advised.
Then apply to a smooth clear surface on the kit where you what it. Just push on the decal evenly or from one side to the other trying to leave an edge of the clear part up.
This is so to make it easy to remove the clear piece using a pair of tweezers. Just carefully grab the corner and lift slowly to make sure not to pickup the decal. Leaving in place. If it starts to lift, just push it back down and try to again until you get it. Removing the clear thin plastic piece completely. Sometimes the glue from the clear piece will leave a residue behind but this is easily removed with careful use of a damp paper towel to clean up but I did this whole sheet and did not run into this issue that much.
And then your done!
Added note: If applying a decal to a curved surface, sometimes it will not want to stay in place evenly over it. To resolve this I used a little dab of glue to the end of a toothpick rubbed it under the decal. Carefully pushing it back down with another one without issue. But it is something to watch for.
In the end, I am VERY pleased with the end results and totally feel that it was worth getting them. If you've had some experience with Gundam kits and their decals if all forms than you should be okay with these. Plus, they normally give you more than you need for some of them leaving you with options. Just don't forget to top coat to make sure that they are protected like always but if you can look past the little fill line on some and take your time, then you may be pleased as well.
Thanks!


